
Screen & camera recording
Record screen, camera and microphone on Mac, keep completed sources separately editable and diagnose missing audio before a full take.
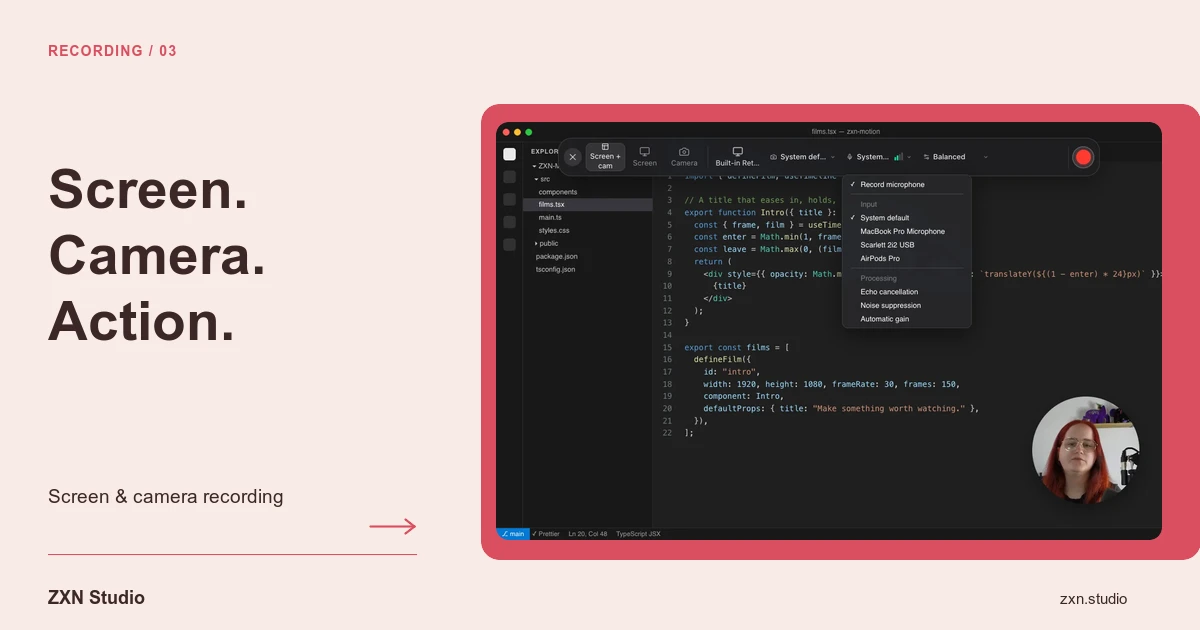
To record a Mac tutorial in ZXN Studio, select your screen content, choose a camera if needed and select a microphone or audio-interface input for narration. Make a short test, play the completed recording and only then record the full demonstration. Completed screen and camera recordings remain separately editable, giving you room to refine their presentation afterwards.
The current native recorder targets macOS 26 or later. Desktop/system-audio capture is currently Windows-only: the Mac recorder captures your chosen input, not an application's internal playback.
Prepare the demonstration before capture
Decide what the viewer should be able to do after watching. Set the application to a recognisable starting state, prepare any example files and remove information you do not intend to publish. Use demonstration data instead of relying on a later crop to conceal sensitive details.
Rehearse the path once. Identify places where a menu opens over another control, a result takes time to appear or a window changes size. These are the moments your recording test should include.
Keep text readable in the intended final composition. A full desktop reduced behind a large camera overlay may leave the actual demonstration too small to follow.
Choose and verify each input
Select the screen content offered by the recorder and check that the preview shows the intended material. If a camera is part of the explanation, select it and confirm the framing. Leave room for normal head and hand movement rather than composing around a motionless pose.
Choose the microphone or audio-interface input explicitly. Speak at normal volume and include a slightly louder sentence in your test. Listen for missing words, distortion and unwanted room sound in the completed recording; visual activity alone does not establish that narration is usable.
The requirements guide explains how to separate operating-system, device and project checks.
Resolve permissions without confusing capabilities
When screen capture is unavailable, review the application's screen-recording permission in macOS System Settings. Apple's official instructions identify the relevant Privacy & Security controls. Check microphone and camera access separately where those inputs are required.
Follow any system prompt to reopen the application after changing access. Then repeat the same short test so that you can compare the result.
A permission labelled with both screen and system audio does not mean ZXN Studio implements both on Mac. Permissions allow capabilities; they do not add a capture feature to an application.
Record in sections that can be checked
For a first attempt, record one complete task rather than several unrelated tasks in one long take. Pause briefly before starting the action and after showing its result. These pauses give you places to trim without cutting into speech or movement.
When you make a mistake, return to a coherent starting point and repeat the sentence and action together. A clean repeated explanation is usually easier to assemble than half a sentence followed by a disconnected click.
Keep the cursor purposeful. Move to the relevant control, perform the action and allow the result to become visible. Avoid narrating one area while pointing at another.
Use the separate recordings during editing
After capture finishes, check both screen and camera media. Because they remain separately editable, you can resize or reposition the camera without treating the screen and presenter as one permanently flattened image.
Place the presenter where they do not cover the active interface. Consider removing their visual presence for a dense section and bringing them back when the explanation benefits from it. Use the controls available in your build rather than assuming an automatic layout will follow every click.
When trimming or splitting related material, verify that speech, facial movement and demonstrated actions still align. The timeline guide explains how to review joins and layers.
Diagnose missing sound or unexpected framing
If your voice is absent, confirm the selected input, its connection and microphone permission. Repeat a short spoken recording before changing unrelated settings.
If narration is present but application sound is absent on Mac, that matches the current capture limitation. Do not repeatedly grant permissions expecting system audio to appear. For a demonstration that depends on internal sound, plan a separately verified capture workflow rather than promising an unsupported source.
If framing is wrong, inspect the completed source before rebuilding the composition. Determine whether the wrong content was captured or whether the editor's layer placement is hiding the right content.
Verify delivery, not only capture
Free recording and export are limited to 1080p at 30 fps. Studio adds higher-resolution and higher-frame-rate options, but Studio-only treatments previewed in Free still require an export entitlement check.
Follow the export guide, then watch the delivered file with sound. A successful recording is one whose final framing, timing and narration communicate the task clearly, not merely one that produced a file.